Being kept outdoors all year long, beehives are exposed to rain, temperature fluctuations, sun, snow, and other weather elements. Naturally, when left unprotected, the wood is most likely to deteriorate. Joints would start to crack, wet areas may rot, and flat surfaces may warp. All of these deformations may even expose the hive interior.
Therefore, painting a beehive is a great way to protect the wooden surface. The added layer of paint conceals the wood and enhances it to last longer.
How do you paint a beehive?
Choose a low VOC paint. Appy 3 coats of paint; 1 coat primer and 2 topcoats. Paint exposed exterior parts only. Bees contact interior surfaces so leave them bare. Choose colors to suit your conditions. Light, reflective colors for hot regions and darker colors for cold areas. Painted hives will last up to 10 years.
Although painting a beehive is a relatively simple process, it requires some sort of basic knowledge. You need to know the type of paint to use, how to paint the various parts, the best time to do it, and much more.
Here is your complete guide on beehive painting that might help you to prepare a safe home for your sweet friends.
Importance of Painting Your Beehive
- Protect the wood
- Temperature regulation
- Helps the hives to blend in
- Help you to distinguish your beehives
- Help the bees to navigate back to their home
- Aesthetic purpose
1. Protect the wood
Most beekeepers paint their beehives to preserve the wood as painting adds seasons of life to the wooden beehive. The additional coating protects the hive from environmental factors that will ruin the wood over time.
Unpainted wood is prone to rotting since it can absorb moisture and it encourages the growth of molds and algae. A damaged beehive can also expose your bees to adverse weather conditions and can lead to contamination of the honey.
2. Temperature regulation
Depending on your climatic region, the colors used to paint can help keep the hive’s temperature conditions comfortable for the bees. In hot areas, using reflective colors help to keep the hive cool. In cold areas, dark colors help to absorb more of the sun’s warmth in winter.
Particularly for beekeepers in cold regions one of the big challenges is helping their hives survive the winter. Painting hive’s dark colors certainly help. We do have an in-depth article on this called, How Do Bees Survive The Winter?
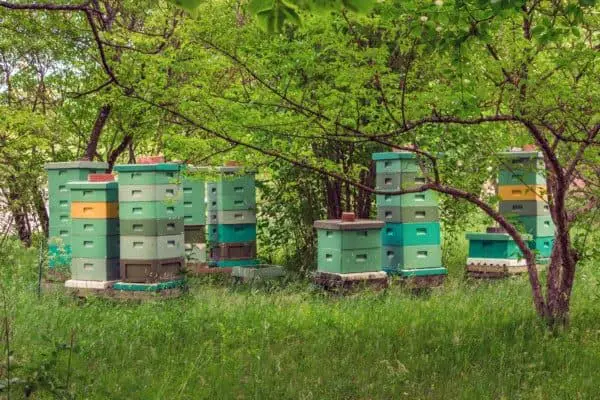
3. Helps the hives to blend in
If you have nosy neighbors who see your bees as a threat, you can paint the hive to blend with the environment. Disguising the hive will protect you and the bees from nervous neighbors or passers-by and avoid complaints.
4. Help you to distinguish your beehives
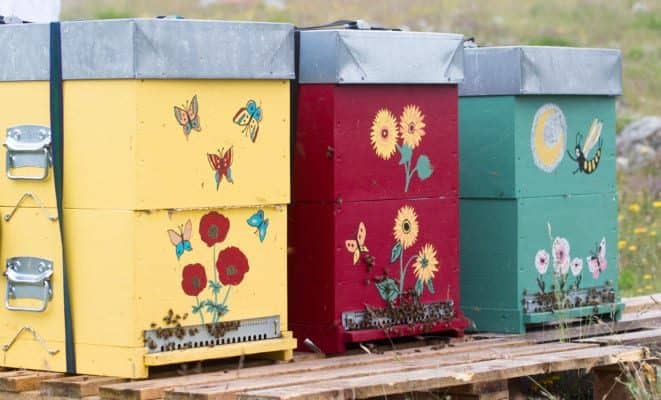
Beehives look relatively the same. Therefore using different colors for various hives helps you to distinguish them and identify a hive that requires more attention or special care.
5. Help the bees to navigate back to their home
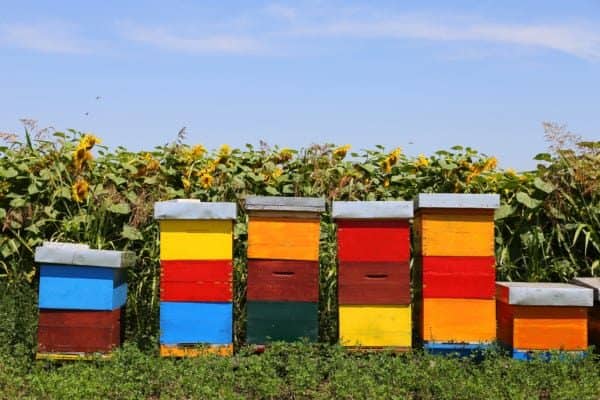
If you have multiple beehives use different colors. This helps the bees to locate their homes easily on their way from foraging. Hives painted with the same shade may cause the bees to drift to other colonies. Large shapes and symbols can help the bees to locate their home easily.
6. Aesthetic purpose
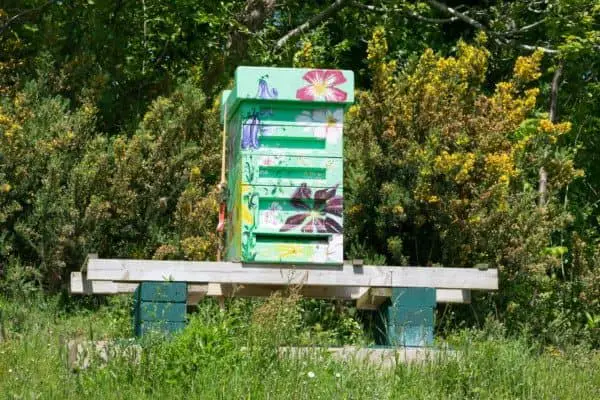
Painted beehives look beautiful and more attractive to the eyes. A hive can be made even more appealing by adding a variety of designs to it. You can also paint your name on the beehive.
What is the Best Type of Paint to Use?
Your choice of paint should not be toxic to the bees. Although no paint is 100% toxin-free, some types are less dangerous to our little friends.
Use paint types for your hive are ones with low hazardous fumes and a less intensive odor. The odor may interfere with pheromone signals in the beehive or even cause a colony to leave the beehive.
Choose paints with low volatile organic compounds; labeled as low “VOC.” Sometimes the paints are marked as “environmentally friendly” or “Green guard.”
VOCs are chemicals that are emitted by the paint in the process of drying and curing. This process is referred to as off-gassing. These chemicals are not only harmful to the bees but to humans as well. If breathed in, they can cause headaches, nausea, damage to the kidney, and liver.
If you are interested in knowing more about the honey bees’ sense of smell then check out this article. “Can Bees Smell Fear?”.
The levels of VOCs are usually marked on the paint’s label. It is advisable to choose paint with a VOC level under 100. Formulations with less than 50 are even better, but those with zero are perfect.
An example of paint with zero VOC is real milk paint and has gained popularity recently due to its eco-friendly nature. It is available in powder form, which is mixed with water to become paint. It gives a matte finish.
The paint you choose also needs to be suitable for the outdoors. Most of the low VOC paints are water-based hence not suitable for the outdoors. However, there are some which are specially made for external use.
Colors of Paint to Use
When selecting a color of paint for your hive, it is necessary to note that bees can see colors. They are attracted to bright colors such as yellow or purple but they do not see red.
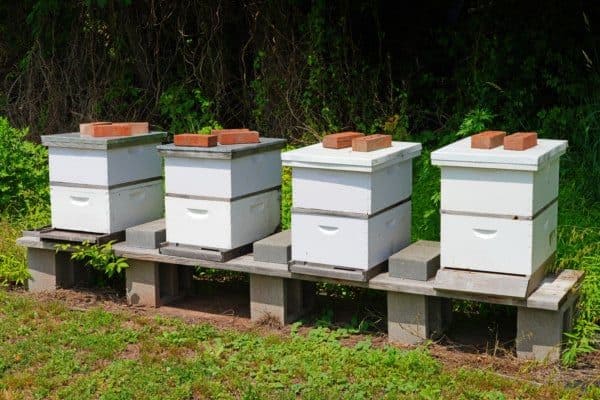
Red color may not be a good choice especially if you want to help them to navigate back to their home. White color is more popular than dark colors.
The color choice of the paint also depends on climatic and environmental factors. Dark colors attract heat and help to keep the hive warm if you live in cold areas. On the other hand, lighter colors reflect light and will help to prevent overheating in warm areas.
Dark paint colors can overheat a colony quickly in summer and it is advisable to avoid black, aubergine, and navy blue if you are living in a warm area. If you want your hive to stand out, you can use bright colors.
Do You Paint the Inside and the Outside?
It is generally advisable to paint the exterior of the hive only; the parts that are exposed to the stresses of weather. The bees apply wax to the interior in no time. They propolize rough and unpainted surfaces more effectively than painted surfaces.
Some people believe that “bee varnish” is better than any modern-day paint. It protects the wood on the inside and also keeps the bees happy and healthy in natural conditions.
Most dyes contain nasty things that you do not want your bees to consume. Be sure to paint the corners, seams, and exposed joints. The boxes start rotting on edges and corners since the water sits on there longer and then gets into the wood.
When is the Best Time to Paint a Beehive?
The perfect time to paint a beehive is before introducing a colony. To paint effectively, you need to disassemble the parts. It cannot be done when your bees are in the hive. You also avoid exposing your bees to chemicals. It is advisable to paint before a beekeeping season to give it ample time to off-gas.
How to Paint the Beehive
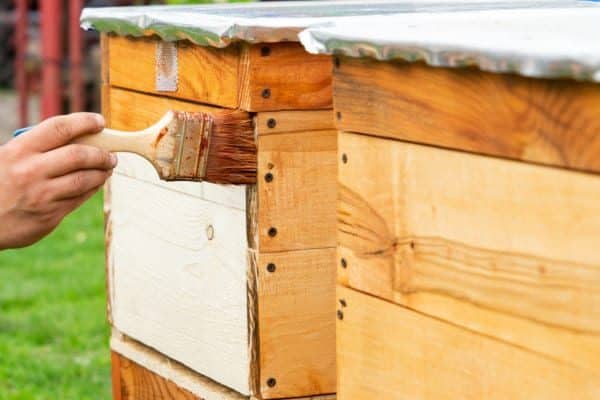
When painting a beehive, remember a basic rule: paint the exterior and leave the inside of the hive bare. You need to coat the beehive in an exterior primer before the actual painting. An oil-based primer is suitable for better protection.
The color of the primer is insignificant. It helps the final coat of paint to stick better, which allows the painted surface to resist moisture and mildew. Here is how to paint the various parts of a hive.
Wooden Hive Stand
You are supposed to paint all surfaces of the hive stand unless you used pressure-treated wood for the stands, there is no need to paint them.
Entrance Reducer
It is wise to leave this part bare. This device with notches of different sizes is used to restrict the entrance of the hive. It can close up the beehive completely or provide a small or large opening depending on the needs of a colony.
Bottom Board
For the bottom board, paint all the wood surfaces. The parts are open to the bottom of the hive and can get moist. In the case of a screened bottom board, painting is not commendable.
Hive Boxes and Supers
Paint on the outside together with the top and bottom edges. Some beekeepers prefer to leave the edges unpainted since it causes the hive bodies to be glued together in warm weather.
Outer Cover
Paint the wooden surfaces on the outside plus the top and bottom edges. The inner side and the metal top should be left unpainted.
Inner Cover
The inner cover should remain untouched. It is protected from the elements since it sits underneath the outer cover.
Frames
The frames should also remain unpainted since they are placed inside the hive.
Feeding Shims
Shims are used for feeding or ventilation and are put between hive boxes. They should be painted on the exterior only along with the top and bottom corners.
Slatted Rack
It is advisable to paint the outside surfaces plus the top and bottom corners.
Do You Use a Brush, a Roller, or an Airless Spray?
Whether you will opt for a roller, a brush, or an airless spray is completely up to you.
A brush is among the oldest and most common tools for painting. It’s flexible, precise, and easy to use. It is ideal for painting edges, corners, and areas that require more attention. You can also create a textured effect with brushstrokes.
More affordable option than a brush, a roller is larger and more efficient for painting a large area or many hives. It provides thin, even, and uniform coats. You have to be careful not to paint the interiors too by mistake.
An airless sprayer may cover a large area fast and provide a smooth finish, great if you are painting large amounts of equipment. However, it can be more time-consuming to set up and clean up. It also takes some practice to get a nice even coat. Inconsistent coverage of paint can lead to lighter and darker areas due to uneven paint distribution.
Step By Step of Painting a Hive
1. Assemble the Hive
The hive comes in parts, especially the hive boxes. So, gather the parts, glue them, and screw them together before you start.
2. Assemble Your Tools
Ensure you have all the required equipment, including brushes or rollers, paint, primer, etc.
3. Prepare the Box Surface
If you are repainting an old hive you may need to scrape, sand, or even repair it before you apply the new paint.
4. Apply a Primer Coat
The undercoat ensures the paint lasts longer by giving a smooth layer where your topcoat will adhere to.
5. Brush Off
Proceed to apply the paint. Wait for the first layer of paint to dry before adding another coat. You can sand between the two layers of paint, but it is not a must.
If you have planned for an elaborate design, you can first sketch your design on the box before applying the paints. You can also use a stencil set. Leave the boxes to off-gas for as long as possible.
6. Don’t Forget to Take Care of Yourself
It is crucial to protect yourself while performing this task. Be sure to wear goggles and gloves. It is also wise to wear a mask if using paint with a strong odor.
How Long Should Your Hive Be Left Before Putting a Colony
After painting your hive, it is advisable to leave it for at least one week before introducing a colony. This allows the paint to dry off and off-gas (a process where the chemicals in the paint evaporate).
You can find more information about the paint curing time on the paint label. Many beekeepers add a few days (or weeks) on the recommended duration to be on the safe side.
It is important to note that even the low VOCs require off-gassing. Uncured painted edges stacked on top of each other can glue together forcefully and become difficult to separate the boxes. Trying to separate them may damage the hive boxes.
How Long Can a Painted Hive Last
A hive can last for about ten years on a one-time application of paint. However, repainting your beehive after every 3-4 years extends its life span to approximately 15-20 years.
Can you dip timber boxes in wax to protect them?
Dipping the wooden hive components in wax is a great way to preserve the wood. The wax is heated to 250 to 300 °F (120-150°C) so as to penetrate the wood. The timber is then submerged in the wax for about 10-15 minutes.
It is important to note that this is a dangerous process. So, unless you are fully equipped and confident in your abilities to do this, it would be better to steer clear.
It is more popular with commercial beekeepers who can afford the upfront costs.
If you still want to paint the wood after dipping in the wax, you should do it immediately when it is still hot. The paint is sucked into the wood as it cools. After cooling, it is difficult to paint the wood since it will not adhere. Wax gives your hive an attractive look as well.
Another alternative for painting a beehive includes the use of a stain or clear coating. Clear coating protects the wood to some extent while displaying the wood’s natural beauty. You should use a stain with low VOCs.
Safety Precautions When Dipping the Wood in Wax
- Wear protective clothing. These include a face shield, leather gloves, hat, protective footwear, and coveralls.
- Make sure the timber is dry. Wet wood causes the wax to froth up and to overflow the tank.
- In case of a wax fire, use an extinguisher. Never put off the fire with water.
- Use a temperature gauge to make sure the wax does not overheat.
- Wax has a flashpoint of 392 °F (200°C). Do not heat the wax beyond 356 °F (180°C).
Painting Plastic Hives
Polystyrene hives have risen in popularity recently. They were initially used in cold regions as they offer better insulation in winter than the cold, damp wooden beehives. They also shield the bees from the summer heat better.
Polystyrene hives are usually painted to protect them against UV light, which degrades the surface over time. Painting is optional, as it can last for many years without coating.
The paint coating also seals the surface against dampness, which may encourage the growth of algae. Algae attract snails and slugs that may damage the surface with their rasping tongues.
If you still opt for painting a plastic hive, is advisable to paint the body only externally. The floors are however painted on all surfaces.
Besides, colonies in polystyrene hives start to build up earlier by 2-3 weeks and can produce more honey than those in wooden hives.
Bees, however, seem to be in love with wooden hives since they resemble their natural habitat.
The Wrap Up
Wooden beehives can last for many years or decades if protected. Setting up the hives without painting them reduces many years of their service.
Painting a beehive may be cumbersome, however, very beneficial in the long run for you and the bees. Investing in paints and primer is less costly than replacing a hive after only a few seasons.
While painting and staining are great in protecting the hives from the elements, exposing the bees to strong chemicals is a risk. Waxing is a natural and chemical-free approach to preserving a beehive.
Sources
https://www.agrifutures.com.au/wp-content/uploads/publications/01-051.pdf
https://www.beehivesupplies.co.uk/PDF/Polystyrene%20Beehives%20Key%20Facts.pdf
https://beekeepinginsider.com/how-to-paint-and-protect-beehives/
https://www.beverlybees.com/how-to-paint-a-beehive/
https://lsebees.wordpress.com/2014/12/18/what-to-consider-when-painting-a-beehive/
https://www.beekeepingfornewbies.com/paint-beehive/
https://beehour.com/how-to-paint-your-beehive-easy-guide-for-beginners/